KIWI boards GPIO Utility
Building on the success of the Android APP for KIWI boards, we are proud to introduce a specialized Windows utility designed to enhance the functionality of the KIWI boards. This robust and user-friendly tool simplifies the testing and configuration of GPIO, PWM, and I2C features, enabling a seamless and efficient development experience. Developers can now access the utility and unlock its capabilities by downloading it directly from our official source.
Key Features of the Utility
-
Simplified GPIO Testing: The utility provides an easy-to-use platform to monitor and control the GPIO pins. With real-time status updates, developers can quickly validate connections and functionality.
-
PWM Configuration Made Easy: Fine-tuning the pulse-width modulation settings is now effortless. Adjust parameters such as frequency and duty cycle directly from the utility for testing.
-
Seamless I2C Communication: Debugging and testing I2C devices connected to the KIWI310 is straightforward. The utility supports reading and writing operations with a user-friendly interface.
-
Efficient Troubleshooting: Users can identify issues quickly and optimize their development workflow.
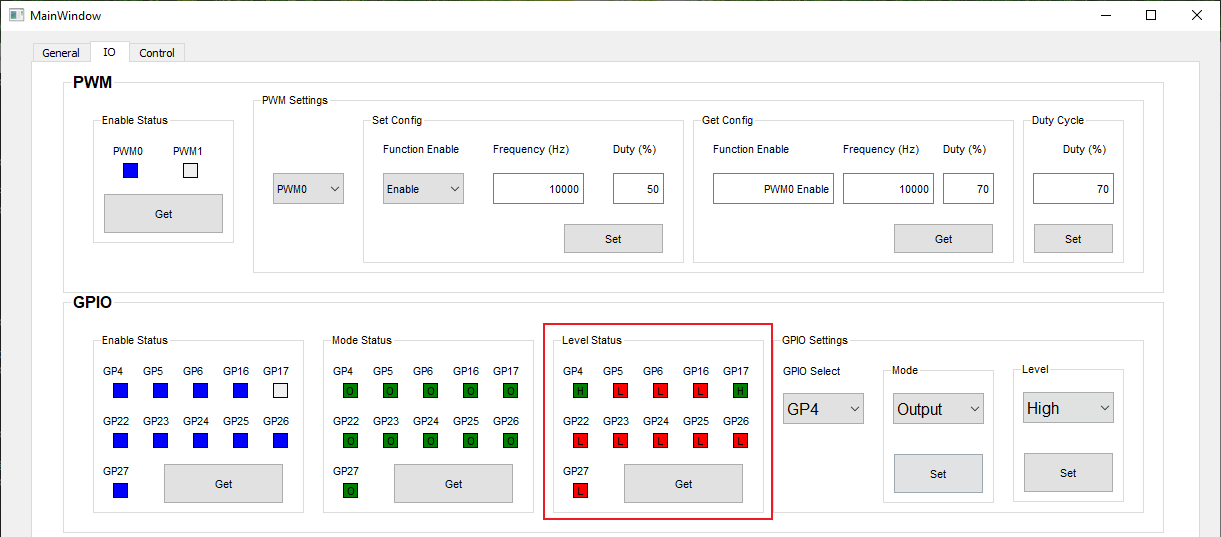
Configure and Control IO Tab : PWM and GPIO
This tab has two primary functions for monitoring and control: PWM and GPIO.
-Enable PWM ports by selecting PWM0/PWM1 from the dropdown menu, setting the frequency and duty cycle, and pressing the SET button.
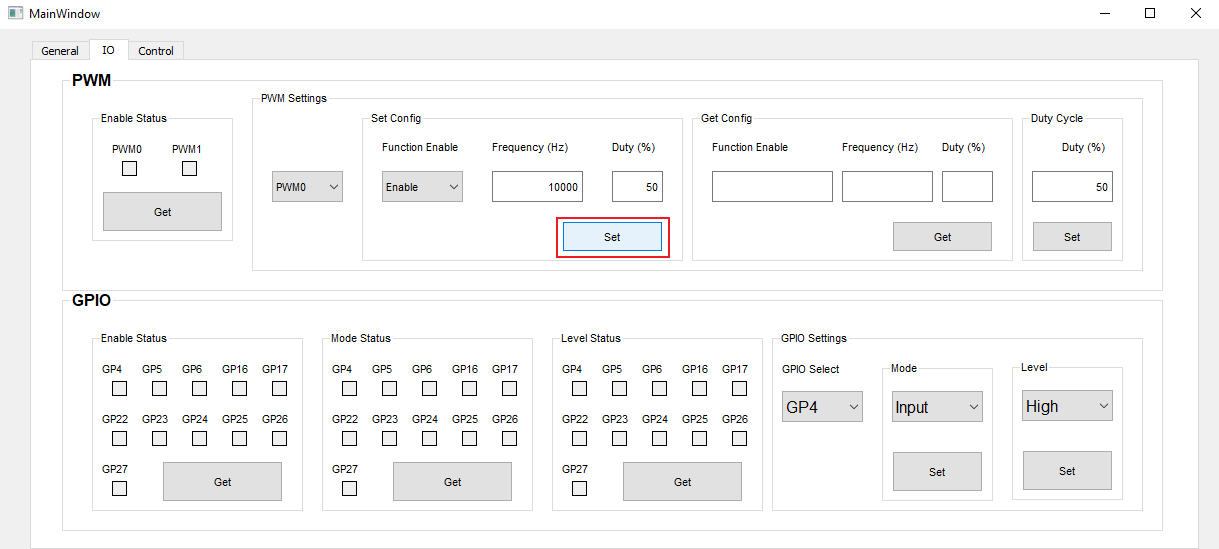
- To retrieve the data, press the GET button. Please refer to our previous article for a detailed explanation of how PWM operates in KIWI boards.
 -To test the GPIO pins, select a Pin number from the dropdown menu, assign its mode (input or output), set the signal level (high or low), and press the corresponding SET button.
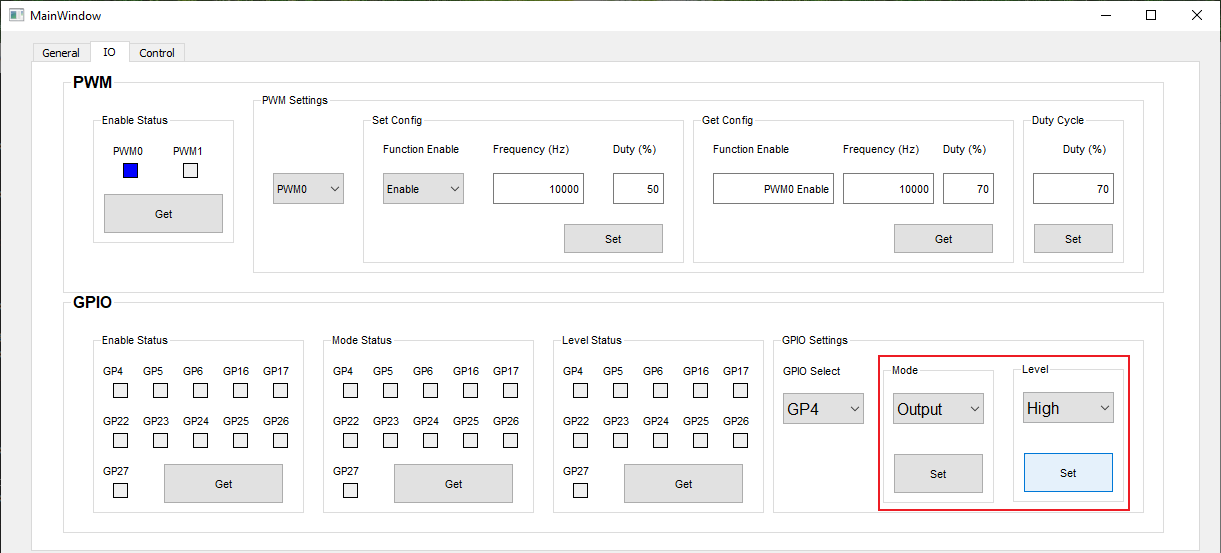
- Monitor the pin’s status, mode, and signal level by pressing the GET button.
Configure and Control Tab : I2C and SPI
This tab allows you to send signals to control external components using serial communication for devices that support I2C and SPI.
-Enable I2C functionality by checking the corresponding boxes (I2C Enable and Repeat), pressing the SET button, and confirming with GET.
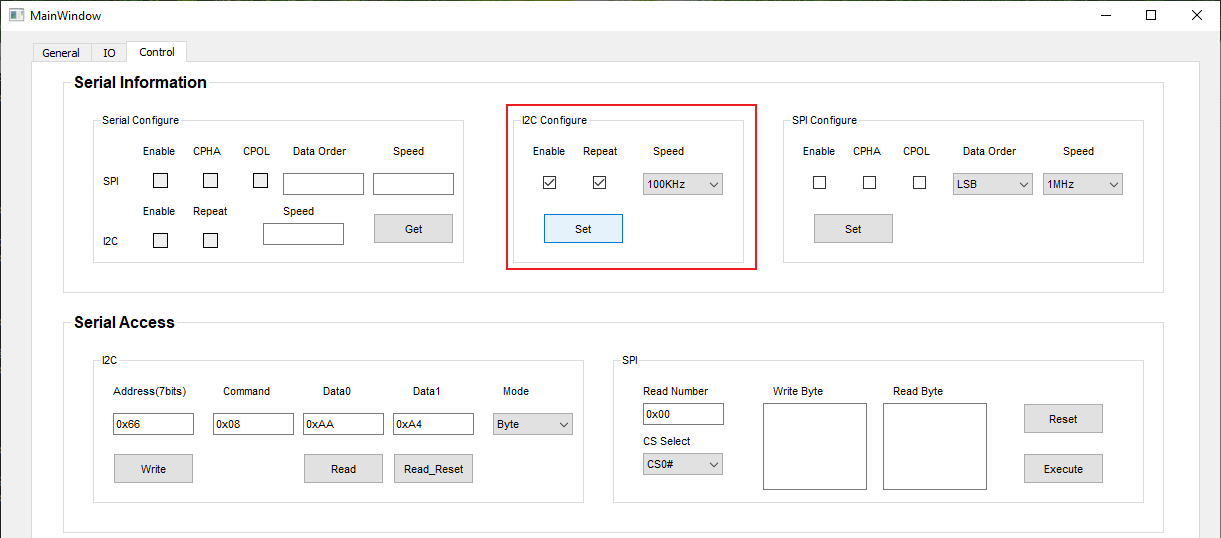
-Input the sensor's slave ID address and commands per the datasheet (e.g., 7 bits ID 0x10 for VEML 7700 sensor). Use the WRITE button to send commands or the READ button to retrieve data.

-Use the 0x04 command to read the 16-bit high-resolution ALS output data of the sensor's luminosity and press the READ button.
About KIWI board
KIWI board is a complete solutions provider, supporting every aspect of your project, from hardware to software and system integration, to get your application functioning securely, reliably, and at peak performance. KIWI board builds its products for high reliability, high performance, security, scalability, and versatility so customers can expect extended service life, quickly adapt to evolving system requirements, and adopt future technologies as they emerge.
Next steps
Ready to talk about your projects with a KIWI board expert? Contact us
Want to hear more from KIWI board? for our newsletterSign up
Or request a quotation

.jpg)


.jpg?v=1731920674)